Connecting to Windows Server 2019 core through WinRM and Windows Admin Center
If you’re familiar with the Microsoft offering, Windows Server 2019 Datacenter Core does not have a UI. My goal was to be able to connect to it remotely, without having to remote desktop on it (the remote desktop is only a command line prompt).
There’s plenty of articles around the internet about WinRM, but I wanted demonstrate here a quick way of getting started without researching too much. Thanks to Scott Sutherland WinRM cheatsheet and Matt Wrock post on understand and troubleshooting WinRM.
For this demo I provisioned a VM on Azure, using the Windows Server 2019 Datacenter Core Image. I also installed the Windows Admin Center, which you can download from here.
TL;DR
- Open PowerShell
- Enable WinRM: Enable-PsRemoting -Force
- Make sure the WinRM service is setup to start automatically
- Trust all the hosts in WinRM
- Open the WinRM HTTP port in the Firewall: netsh advfirewall firewall add rule name="WinRM-HTTP" dir=in localport=5985 protocol=TCP action=allow
- Open the port 5985 in the NSG (inbound)
- Add a DNS label to your Public IP DNS (if you’re not using you’re own DNS)
- Configure Windows Admin Center to connect to your DNS label and specify the credentials to use another account for this connection
How to
After you provisioned the VM, login to it using Remote Desktop.
Get into PowerShell session by typing PowerShell.
Once in PowerShell, enable WinRM by typing Enable-PsRemoting -Force
Make sure the WinRM service is setup to start automatically
|
1 2 3 4 |
Set-Service WinRM -StartMode Automatic # Verify start mode and state - it should be running Get-WmiObject -Class win32_service | Where-Object {$_.name -like "WinRM"} |
Trust all the hosts in WinRM. Note, in a Production environment, you do not want to do this.
|
1 |
Set-Item WSMan:localhost\client\trustedhosts -Value * |
Check that all the hosts are trusted
|
1 |
Get-Item WSMan:\localhost\Client\TrustedHosts |
Open the WinRM HTTP port in the Firewall
netsh advfirewall firewall add rule name="WinRM-HTTP" dir=in localport=5985 protocol=TCP action=allow
Open the port 5985 in the NSG (inbound)
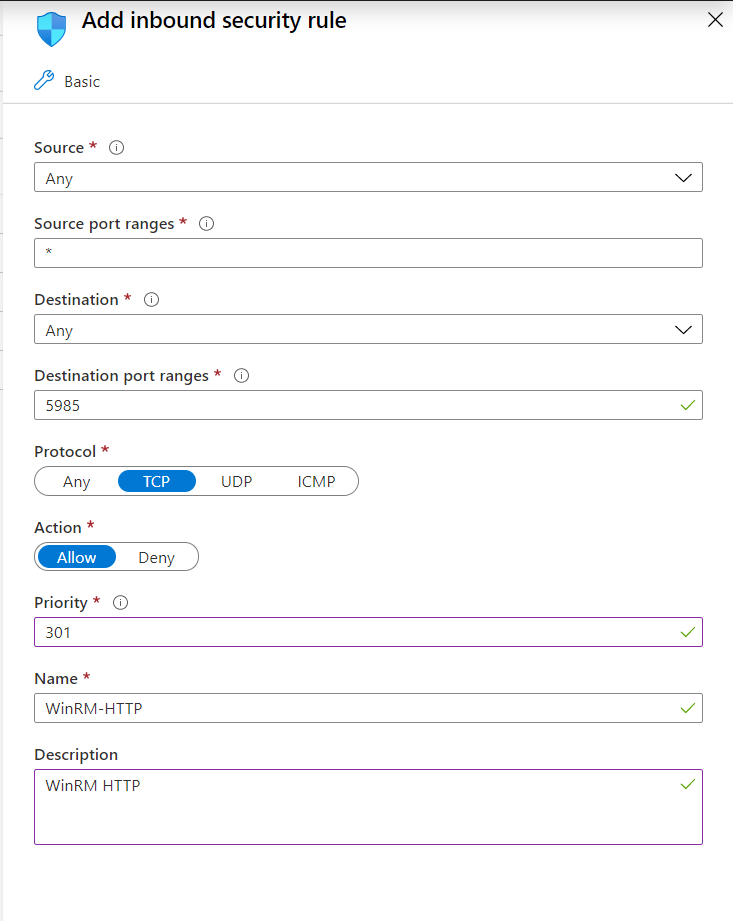
WinRM NSG
Again, in a production environment, you will need to secure this.
Add a DNS label to your Public IP DNS (if you’re not using you’re own DNS)
Test that the connection works
In a *nix/osx environment, use the following command
|
1 |
nc -z -w1 <IP or host name> 5985;echo $? |
If you’re using Windows, you can use Test-WSMan
Test-WSMan -ComputerName <IP or host name>
Configure Windows Admin Center
In Windows Admin Center, click the Add button

Then select Windows Server
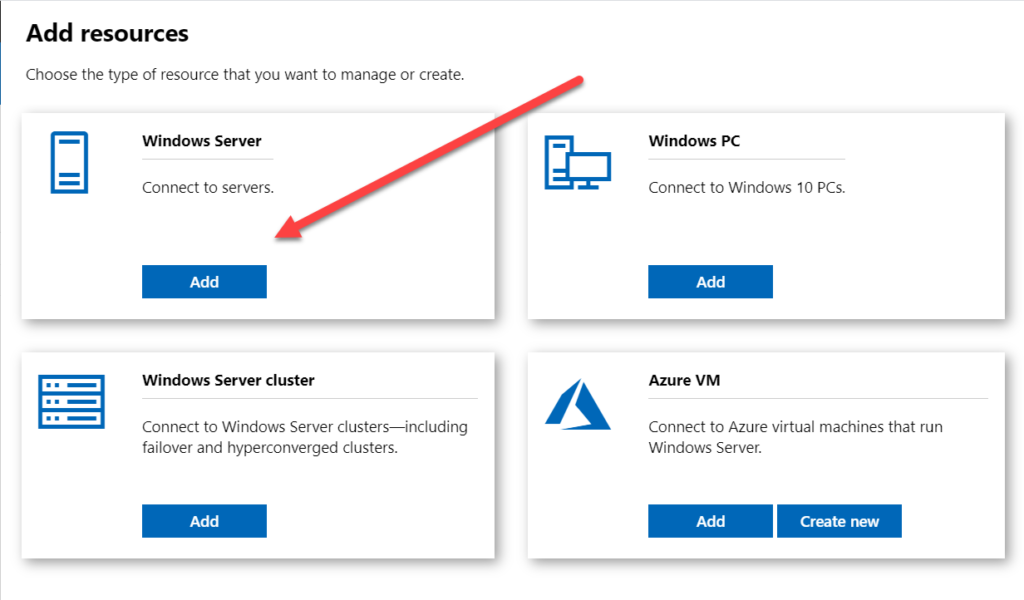
Note you can also connect to an Azure Virtual Machine, but you will need to sign in to your Azure account
Enter your DNS label name associated to your public ip
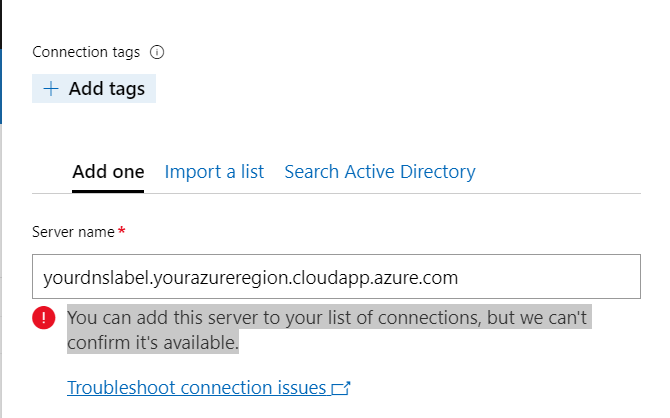
When adding your server name, the tool may tell you You can add this server to your list of connections, but we can’t confirm it’s available. You can discard the warning.
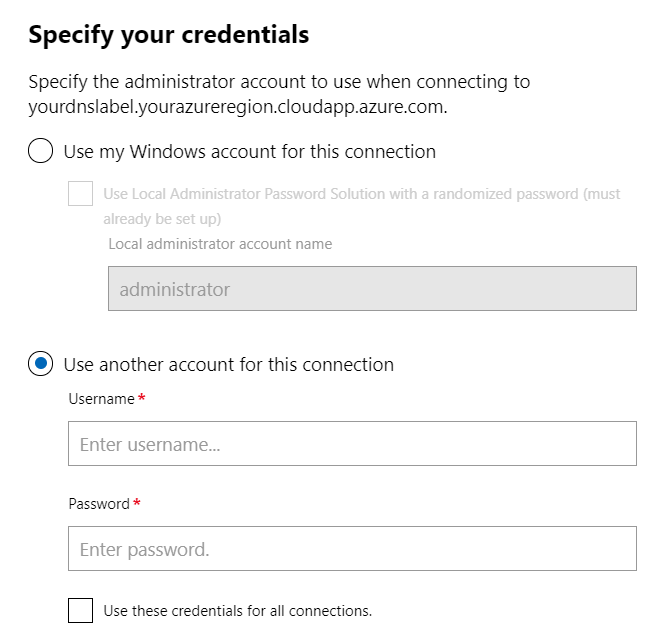
Select your server and click Manage as
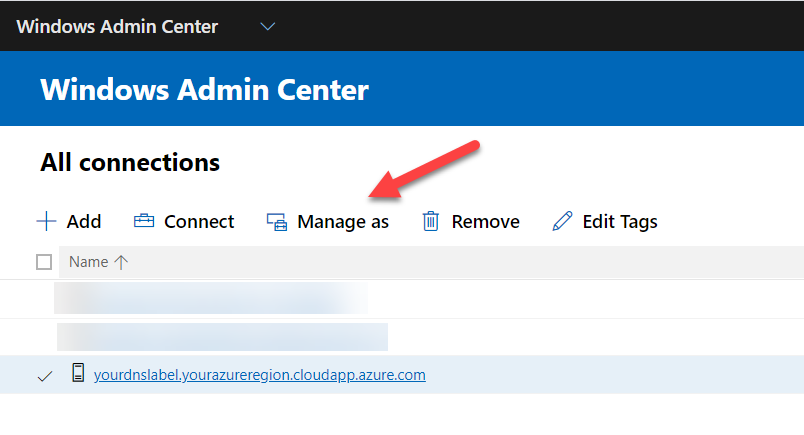
Then specify your credentials and select Use another account for this connection