
Signing your GitHub commits with GPG and YubiKey
I got a YubiKey recently and saw a YouTube video where the presenter quickly showed how to sign GitHub commits. I found this a useful thing, as on GitHub, you can just set your name and email in your git config and GitHub will link that it’s from you but when in fact it may not. I saw this with Linus Torvalds, where someone saw he had “made” commits on a repo, but it did not seem to be something he would contribute on. Was it really him? Who knows, but I realized it was time for me to go a little bit beyond the normal security aspect and use my YubiKey for more than just for FIDO2 authentication.
For info, I use a YubiKey 5.
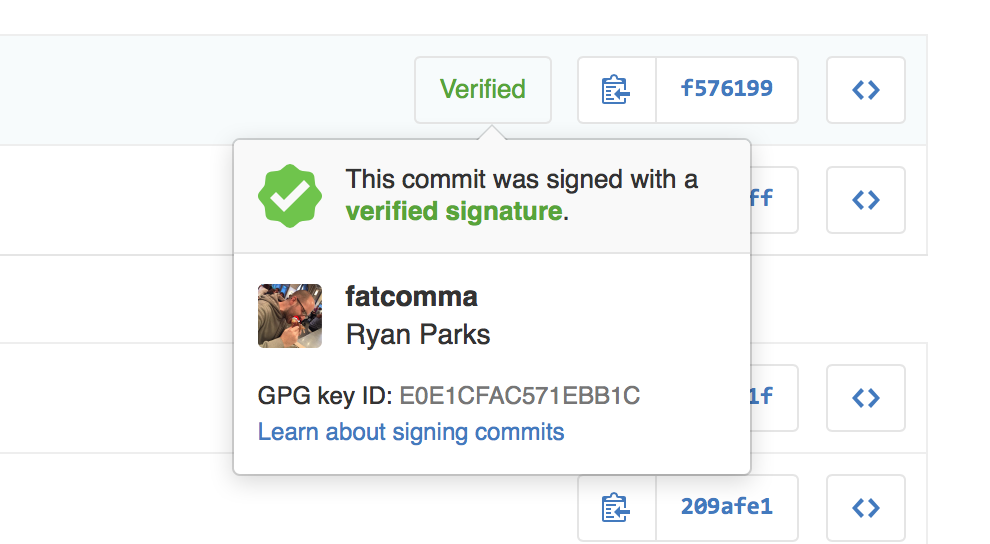
What does the end result look like? It looks like this
This post focuses on the setup on Windows. However, the setup is similar for OSX and Linux. See the reference post for more information.
GPG key and YubiKey setup
First thing you will need is to install GPG4Win.
Once installed, plug in your YubiKey, if not already plugged in, and fire up a command line terminal (CMD or PowerShell).
Update 2021-12-13: While I haven’t tried it personally, you may be able to do passthrough of USB devices now with https://github.com/dorssel/usbipd-win into WSL2. See this post for more information.
Creating your keys
You can create your GPG key by issuing the command
gpg --full-gen-key
- When prompted to specify the key type, enter 1 (for “RSA and RSA (Default)”).
- Specify the size of key you want to generate. Do one of the following:
- Specify the expiration date of the key.
- Enter your Real Name. Be sure to enter both your first and last name.
- Enter your Email Address. Make sure it is the same one configured in GitHub and in your git config
- If desired, enter a Comment about this key. To leave the comment blank, press Enter.
- Review the information you entered, make any changes if necessary. If all information is correct, enter O (for Okay).
- Enter the passphrase for your key.
By default, the key generated contains Signing [S] and Certifying [C]. Encryption [E] and Authentication [A] is also supported but outside this post. See the reference post for more information on how to do that.
Once you have created your key, it should reside in the keyring, located in C:/Users/<your_username>/AppData/Roaming/gnupg/pubring.kbx
Putting the signing key on the YubiKey
In order to put the signing key on the YubiKey, first check that GPG can see the key. In the same shell, type
gpg --card-status
You should see something along the lines of
|
1 2 3 4 5 6 7 8 9 10 11 12 13 14 15 16 17 18 19 |
Reader ...........: Yubico YubiKey OTP FIDO CCID 0 Application ID ...: D2760001240102000060000000420000 Version ..........: 3.4 Manufacturer .....: Yubico Serial number ....: 00000042 Name of cardholder: [not set] Language prefs ...: [not set] Sex ..............: unspecified URL of public key : [not set] Login data .......: [not set] Signature PIN ....: not forced Key attributes ...: rsa4096 rsa2048 rsa2048 Max. PIN lengths .: 127 127 127 PIN retry counter : 3 0 3 Signature counter : 0 Signature key ....: [none] Encryption key....: [none] Authentication key: [none] General key info..: [none] |
If you see this, this is great news, as you are now able to see your key using gpg.
Setting up the key properties
To modify a few of the key properties, type
gpg --edit-card
this will open the gpg shell command.
Verify that the admin status is enabled by typing admin. If you see, as response, Admin commands are allowed, then you are good to go.
Useful commands:
- passwd: change the user and admin PIN
- name: change the name of the card holder
- lang: change the language preference
- url: URL to retrieve public key
- sex: change the card holder sex
- login: change the login data (account name)
see this documentation for more information.
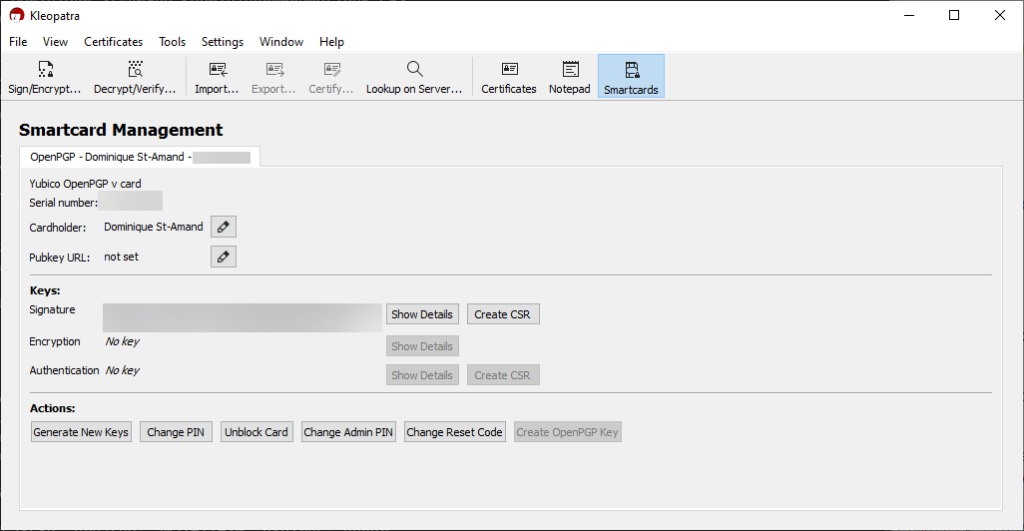
You can also do the same by opening the application that comes with GPG4Win called Kleopatra. Click the Smartcards menu icon, and refresh (F5) the section. You should have access to modify certain information.
Importing the signing GPG key on the key
gpg –export-secret-keys <keyID> > private.key
Now it’s time to add the signing (private) key to the YubiKey. In a shell type
gpg --list-keys
Grab the keyID from the list in the output. Look for something in the output like
|
1 2 |
pub rsa4096 2021-11-30 [SC] <keyID> |
Then issue the command
In the gpg command prompt:
- Enter the command: keytocard
- When prompted if you really want to move your primary key, enter y (yes).
- When prompted where to store the key, select 1 (Signature). This will move the signature subkey to the PGP signature slot of the YubiKey.
- Enter the command: quit
- When prompted to save your changes, enter y (yes). You have now saved your keyring to your YubiKey.
Git setup
The first thing you need to do is tell git where the GPG executable is located.
git config --global gpg.program 'C:\Program Files (x86)\GnuPG\bin\gpg.exe'
If you installed GPG somewhere else than C:\Program Files (x86)\GnuPG folder, change it in the command above.
Now you have 2 choices. You can setup your signing key and auto-signing globally using the --global parameter or use it on a per repository basis.
Per repository:
|
1 2 |
git config user.signingKey <keyID> git config commit.gpgsign true |
Global
|
1 2 |
git config --global user.signingKey <keyID> git config --global commit.gpgsign true |
If you dont want to use auto-signing, when commiting code, use the -S parameter instead when commit, i.e.
git commit -S -m "My commit message"
To verify that the commit has been signed properly, you can do
git show HEAD --show-signature
GitHub setup
For GitHub to be able to verify you, you need to upload your GPG public key.
First, export your GPG public key by doing
gpg --output public.pgp --armor --export username@email
replace username@email with the email you configured your key. Copy the content of the file.
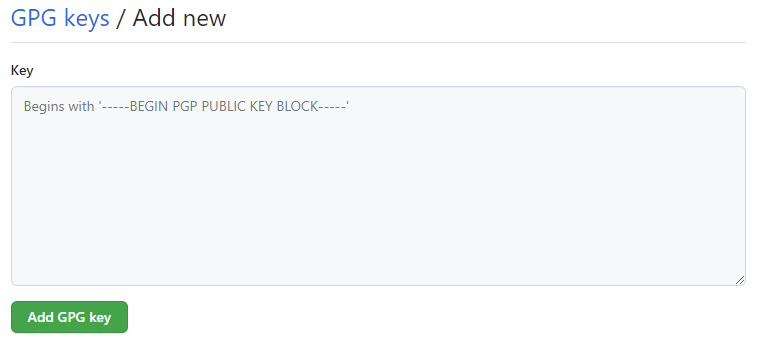
In GitHub, navigate to your profile and in the SSH and GPG keys section, click the new GPG key button and paste in the textbox the key you copied.
Unfortunately, this technique does not work for Azure DevOps yet. As I read in this GitHub issue, someone answered: Azure DevOps (VSTS) does have the concept of pushed by which is kind of similar, but I know it is not the same thing. If you want to see this feature implemented, please vote here!
Setting up another workstation
You need to import your public GPG key into your machine.
Export the public from your current machine
gpg --output public.pgp --armor --export KeyID
gpg --card-statusFind the line that says Signature key. Your KeyID is the last 4 blocks of the ID without the spaces. For instance, if the status returns
4867 F230 E32E 4D0F 88DA 1321 7569 0F93 463F 9953, then your KeyID is 75690F93463F9953.On the other machine, import your public key by typing
gpg --import public.asc
Once imported, you will need to trust your key. To do that, execute the command gpg --edit-key <keyID>. at the prompt, type trust, and then select the option 5 for ultimate trust, confirm y and then quit.
All you need to do afterwards is redo the Git setup section.
But Dom, what if…
So I want to use the touch key on my key instead of using the PIN every time. How can it be done?
You need to install the yubikey manager (ykman). If you installed the Yubikey Manager GUI, navigate to the folder C:\Program Files\Yubico\YubiKey Manager and in a command line type
This will open the help on what you can do. For instance, to enable the touch, do
You will be able to touch the key after first unlocking it with the PIN. The pin will not be required after that.
For more information, refer to this GitHub repo.
Last notes…
There’s a property, named url, on the YubiKey, for the opengpg section. Since this an asymmetric encryption (private/public keypair), you need the public key in your machines to be able to sign. This is why it can be interesting to drop the key somewhere available on the internet and set the URL of the public key on your key. Like that all you need is to download it and import it.
Happy commit signing!